Showing posts with label Sewing. Show all posts

Friday, March 6, 2020

Betty the Bear Stuffed Plushie Doll from Spoonflower - The Costume Collection

Everyone loves playing dress up, including Betty, who loves to dress up as her favorite animal - a bear.  Betty is dressed up as a dark grey bear with purple accents and is ready to be brought to life by a loving friend. 
Betty the Bear is a great beginner project for both adults and kids that can be sewn either on a sewing machine or by hand. 

Make your own Betty from StargazunDesigns on Spoonflower or purchase a pre-made one from StargazunDesigns on Etsy.


Tuesday, June 24, 2014

Handmade Flannel Baby Burp Cloths With Cute Giraffes

We've had a lot of friends and family having babies recently, so I have been looking for different things I can make and add to a gift.  While sitting at a baby shower recently, a family member mentioned that she couldn't have had enough burp cloths when her kid was a baby, so for the latest shower I went to, I made some with some cute giraffe fabric I had in my stash.  

Tuesday, October 1, 2013

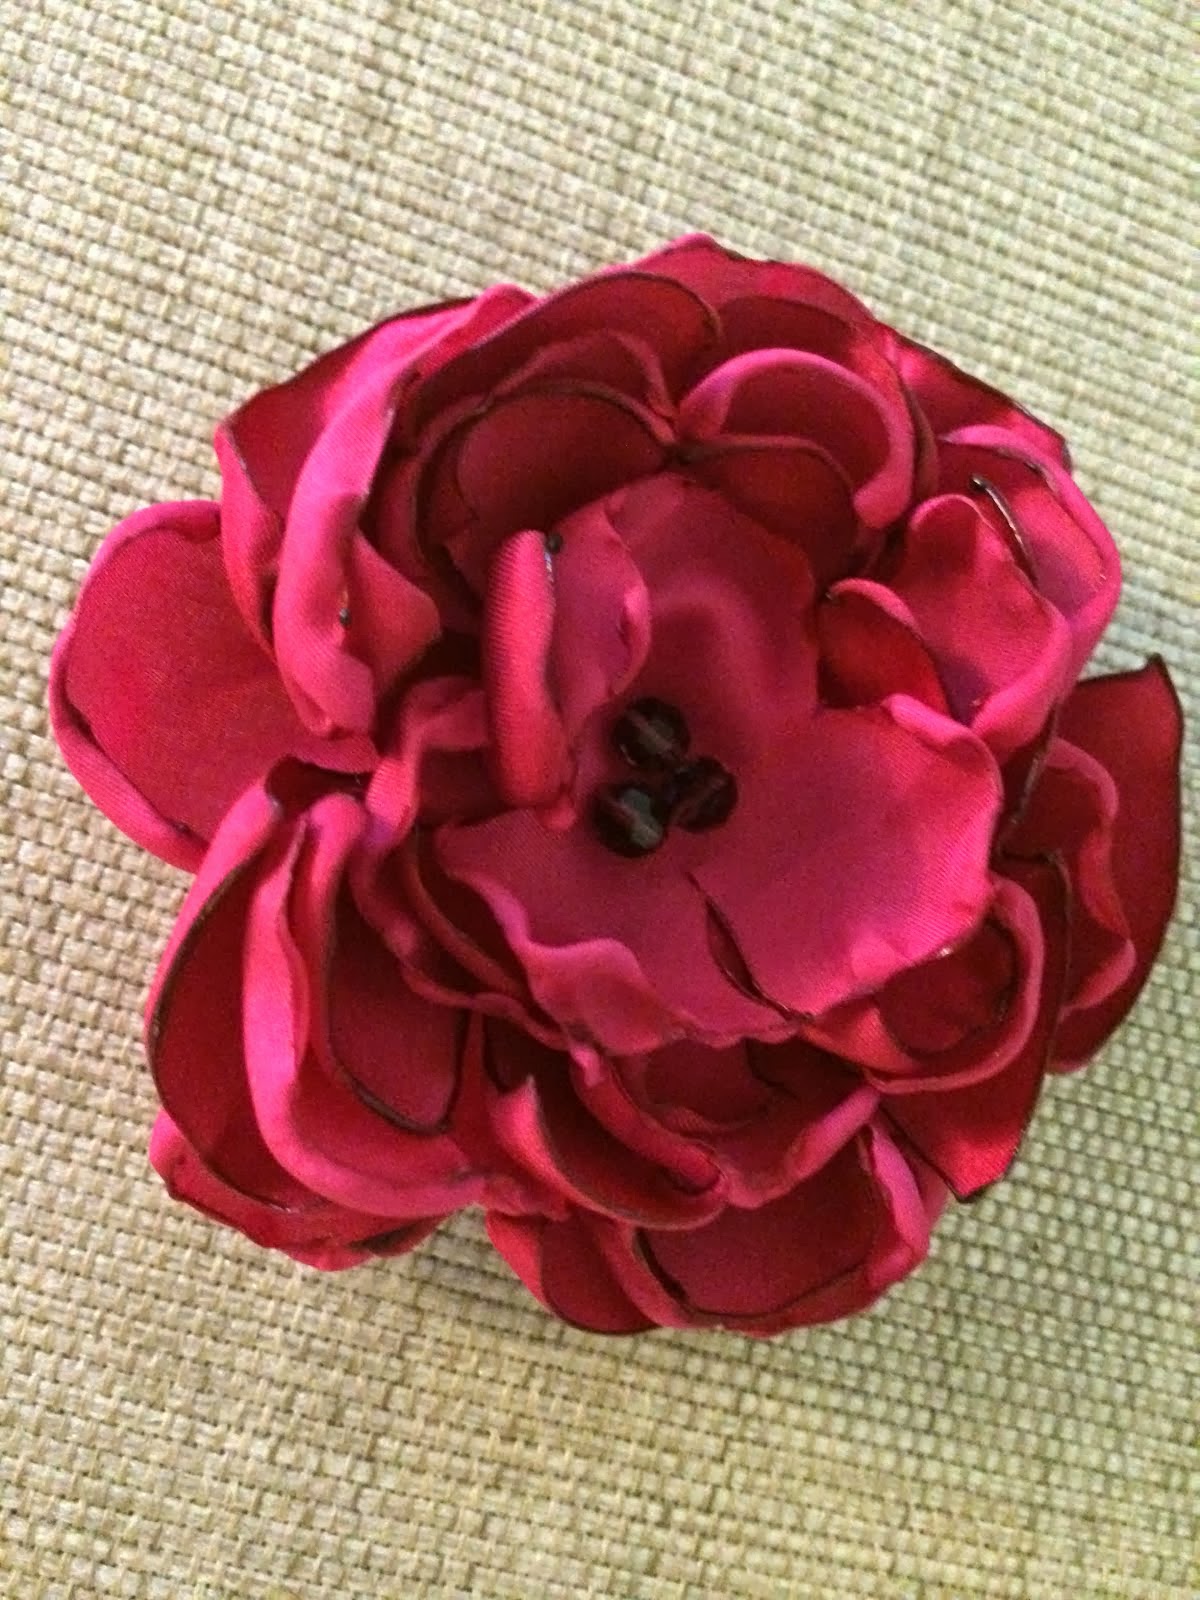
Pink Satin Singed Flower and Purple Crystal Pin

Black Satin Metal Snap Top Frame Purse With Pink Lining

Black satin snap top metal frame clutch I made for my sister in law's birthday (not the best angle of the bag).
A better angle of the bag- photo taken with the flash on.
I had leftover scraps of my bridesmaids dress for her wedding that I used to make a flower pin for the outside of the bag. The scraps weren't big enough to line the interior of the bag, but I was able to find fabric to match. 

Tuesday, September 24, 2013

Off White Silver Metal Snap Frame Wedding Clutch Purse With Singed Flower Pins

I've been wanting to make a metal frame top purse for a while since I love the clean finished look but it always was intimidating to me.  My sister was in her good friends wedding this weekend, so I figured helping her make a bag for her friend and having a deadline would force me to finally learn how to do it. I did a trial run with some black satin scraps I had hanging around, and it was much easier than I thought (which is good since I bought my metal purse frame in a lot of 5 from Upstyle on etsy).  I've been making bags with zippers now for a while and this process is much easier and the sewing is much faster.


To make the bag I sort of followed Dear Stella Design's tutorial with some modifications.  I made both of the flowers as pins, so either one (or neither) could be used.  The purple was the fabric I used for the lining, and it was also the same color as the fabric of the bridesmaids dresses.  I had never made singed flowers before (never really even heard of it until I was looking on pinterest for something to add to the bag) and that ended up being fairly easy too.  I made the off white one with a tutorial from Just Between Friends and the purple one loosely from Think Bowtique's tutorial.


I luckily had some heavy duty glue on hand from a bead embroidery project I was working on to attach the frame to the fabric.  Getting that just right is probably the hardest part of making the bag.
My sister originally wanted the bag to not sit much below the bottom of the frame, but I think if I did that, it wouldn't hold much.  
Now that I have a pattern I drafted and know what to do I'm excited about making a bunch for myself!

Sunday, April 21, 2013

Blue and Pink Bubble Sewn Card Holder

This is the third card holder I've made from this pattern by 'The Crafty Cupboard'.  Its an easy pattern and its a great way to use up extra scraps. 

Saturday, March 2, 2013

Sewn Tote Bag Made From Folklore Bag Pattern

This bag was made from the Folklore Bag Pattern in the book "One Yard Wonders".  I modified the pattern a little bit by cutting two pieces for the outer sides of the bag (so the directional fabric wouldn't be upside down on one side).  I also attached the top pieces of the bag a little differently than the directions said since it seemed like too much work.

I made the bag with a quilting weight fabric backed with a light weight fusible interfacing.  The pattern said to use a home decor fabric but I loved this fabric and couldn't resist.  I think that if I used a cotton fabric again, I'd use a medium weight fusible interfacing.

Sunday, February 10, 2013

Fleece Stuffed Rainbow Star Pillow Sewing Pattern Tutuorial


My mother in law gave me this star wall hanging made out of upcycled magazines for Xmas.  Last week I was bored and looking around my craftroom for inspiration of something I could sew and I focused in on the star.  Recently in a sale I stocked up on a bunch of fleece fabric remnants since they were so cheap, so I decided to make a fleece 3D star.  I think if I made another one I'd replace the yellow color with somethign else but overall I like how it came out.  The pillow came out approximately 14.5 inches accross when finished so its the perfect sized pillow for a nursery or as a fun accent anywhere. If you'd like to make your own check out the pattern below...

**If you sell or post any items made from this pattern, please include a link back to my site.  (EX- "This item was made from a pattern on Stargazun Designs" ) Thanks!!**

Fleece Stuffed Rainbow Star Pillow Pattern:
Supplies:
  • Scraps of 10 colors of fleece
  • Pattern Tracing material like Pellon 830 (optional)
  • Ruler
  • Rotary cutter and mat or Scissors
  • Thread (I used a medium tone grey- it seemed to blend the best with all of the colors)
  • Hand Sewing Needle
  • Sewing Machine

Directions:
  1. I created a pattern on my pattern tracing material. Measure and cut a piece 2.5in by 10in. On one of the longer sides, mark up 3.5in. Using your ruler, make two cuts by connecting the mark to each of the opposite corners. You should now have a off center triangle like below. (*NOTE* If you don't create a pattern, you can cut each piece of the star like this to get the same result.)
  2. Cut out two triangles of each of the fabrics. Make sure you cut them opposite- one with the pattern right side up and one with it wrong side up. After cutting, when you line up like sides, the triangles should be right sides together. The easiest way to do this is to fold your fabric in half and cut two pieces at once (which I know is sometimes hard to do with fleece).
  3. Lay your pieces for one side in whatever order you choose. (Match long sides of the triangle to create a star point. Keep the smallest edges towards the middle of the triangle and match those in between points.) Repeate the same pattern with the pieces of the other side WRONG side up.
  4. With your fabrics that are right side up, sew along the long edges creating 5 sections of the star (sew them in the order they are in but make sure to keep the seams on the WRONG side of the fabric).  Sew the 5 sections together along smallest sides. Repeate with the pieces that were layed out wrong side up (again, keep them in the order they are in but make sure to keep seems on the WRONG side).
  5. In the center, my sewing wasn't perfect and my edges didn't match up perfectly. I took some thread and needle and hand sewed the pieces together where needed. If you dont want to do this you can put a button in the middle of both sides once the piece is finished to cover up any imperfections.
  6. Put the two star shaped pieces RIGHT SIDES together. Match colors and pin.
  7. Sew around the edges leaving a 4in seam opening on one of the edges of the star.
  8. Clip down points so there isn't a lot of excess fabric. Turn the star right side out making sure to push out points.
  9. Stuff.
  10. Hand sew opening closed.
  11. Enjoy your new pillow!

Sunday, January 13, 2013

Pink Dots Sewn Sequined Flat Bottom Bag

I made this square bottom bag pattern a while back and I've made a couple more recently with added embellishments. I've been using them to store smaller items in my craft room. 

Like this bag, its for sale in my etsy shop.

Sunday, January 6, 2013

Fleece Lamb Stuffed Animal - My First Plushie

I've have wanted to try to make a stuffed animal for a while now but I was always intimidated by the number of pattern pieces. I finally got around to it and the worst part wasn't the sewing but cutting out all the little pieces. I used a store bought pattern and I thought that the instructions were a bit lacking. At this point Ive sewn enough that between what instructions there were plus looking at the picture on the front of the pattern I was able to figure it out but I think it would be fairly hard for a new sewer.

If you would like your own, I have one available in my etsy shop.

Wednesday, December 12, 2012

Bikini Top I Made Not To Wear But To Practice Sewing Knits

I bought this fabric remnant on sale for a little over a dollar because I wanted to practice sewing knits before trying to make something to wear. I found the smallest knit pattern I had in my stash (a vintage bathing suit pattern) and got to work. It all came out pretty well except the bottom-the fabric got a little stretched while sewing it. Overall, though, it was much easier than I had expected.

Tuesday, December 11, 2012

Pull On Pajama Pants With Pockets

A couple of weeks ago I took a two night pajama pants sewing class. Back in middle school we made flannel pants but I haven't made any sewn clothing since then. They weren't very hard to make but it was a good review of how to shorten/lengthen patterns (since I'm tall I always have to lengthen them), what to do with seams and how to fit stuff for your body. I have a couple of knit fabrics I bought on sale that i've been wanting to make a sundress out of but I think I still need some more practice until I'm ready for that.

Monday, December 10, 2012

Living Room Floor Pillow

I found this remnant at JoAnns on sale which matched our living room walls and couches perfectly so I bought it for a floor pillow. My husband likes sitting on the floor with one so I finally got around to making him one. The scrap was the perfect size- all I had to do was to trim the edges straight, sew around the edges, stuff (then stuff some more cuz he wanted it super thick) and see up the hole. If only all projects were this quick and easy.

Monday, November 19, 2012

Living Room Pillows With Piping

About a year ago my husband and I went on a trip to the store to pick out some fabric to use for pillows in our living room. I happened to find piping that matched almost exactly to the fabric we picked out on clearance so I picked up some of that also. Ive veen sewing for about a month now so making square pillows is an easy enough task but adding the piping was a but intimidating. After breaking 4 needles and having to hand see up most of the corners (since i didn't get close enough to the piping) it's still intimidating enough to want to just make easy square pillows for the rest. (Un) fortunately I think the one with the piping actually came out looking fairly good which makes me want to finish the east with the piping. I'll see how long it takes me to finish off the rest of them...

Sunday, September 30, 2012

Teardrop Bag from Amy Butlers Style Stitches

 I just finished my version of the Teardrop Bag from Amy Butler's book 'Style Stitches'.  As I was making the bag, I had already cut out the hips, but I decided not to use them on the bag.  Since they were already cut, I decided to cut three more sets and make a flower out of them.  I wasn't sure if I'd like it (and I'm still 50/50 on it) so I make it a pin that I could add/remove at will. 

Like this bag? Its for sale in my Etsy shop.

To make the flower: I cut out 10 of the hips from the pattern and sewed them together in pairs- right sides together (leaving the end open to turn them).  I then machine basted them together with the largest stitch my machine would do (below) while leaving a large amount of string at both the beginning and the end.  I took one of the strings from one of the ends and pulled it to bunch the 'petals'.  I then knotted the ends together and went around the edges again with another piece of thread and a needle to help secure the flower.  I used the fabric from the inside of the bag to make a 11/8' button for the center.  I then sewed it into the center of the petals and sewed a pin on the back.


Wednesday, September 5, 2012

Amy Butler's Key Keeper Coin Purse (Style Stitches)

My first completed project from Amy Butlers Style Stitches book. I like the coin purse but it's really bigger than an average sized coin purse - in between a wristlet and a coin purse. I think if I made it again I wouldn't bother with the pocket- being the whole width of the bag it just seems to take up space.

Sunday, June 3, 2012

Black And Pink Hobo Bag - Sweet Pea Totes Pattern

I just finished this bag from a Simplicity Sweet Pea Totes Pattern.
This is the first item that I've made from a pattern in years (since working on costumes for a school play) and the first full sized bag I've made. It took a while since I've been so busy lately but it was worth the wait!