Showing posts with label Other. Show all posts

Monday, February 9, 2015

Crayon Heart Valentines Tutorial


My sister, who teaches first grade, came over last week to have me help her make Valentines for her students. She had picked up some small Valentines Day themed pads of paper and she wanted to make multi colored crayons to go with them. I happened (because I'm a crafty hoarder lol) to have a silicon heart chocolate mold sitting around the she used to make her crayons. They're easy to make and they are the perfect way to reincarnate old broken crayons into something awesome!


Crayon Valentines Hearts

Supplies Needed:
* Old Crayons
* Silicon Heart Mold
* Cookie Tray (for stability when taking mold in/out of the oven)
* Oven

Directions:
1. Pre-heat the oven to 230 degrees.
2. Cut up old crayon into small bits.  If you are making these with kids, they can break them into small pieces with their hands. 

3. Put an assortment of colors into each heart mold. 


4. Place the silicon mold onto a cookie tray for stability putting the mold in and taking it out of the oven. Put the mold into the oven for 15 mins.
5. Take the mold out of the oven and let the mold sit for 10 mins. 
6.  Stick the mold into the fridge for a couple of minutes and the crayons will pop right out!
7. Enjoy!!


Monday, March 25, 2013

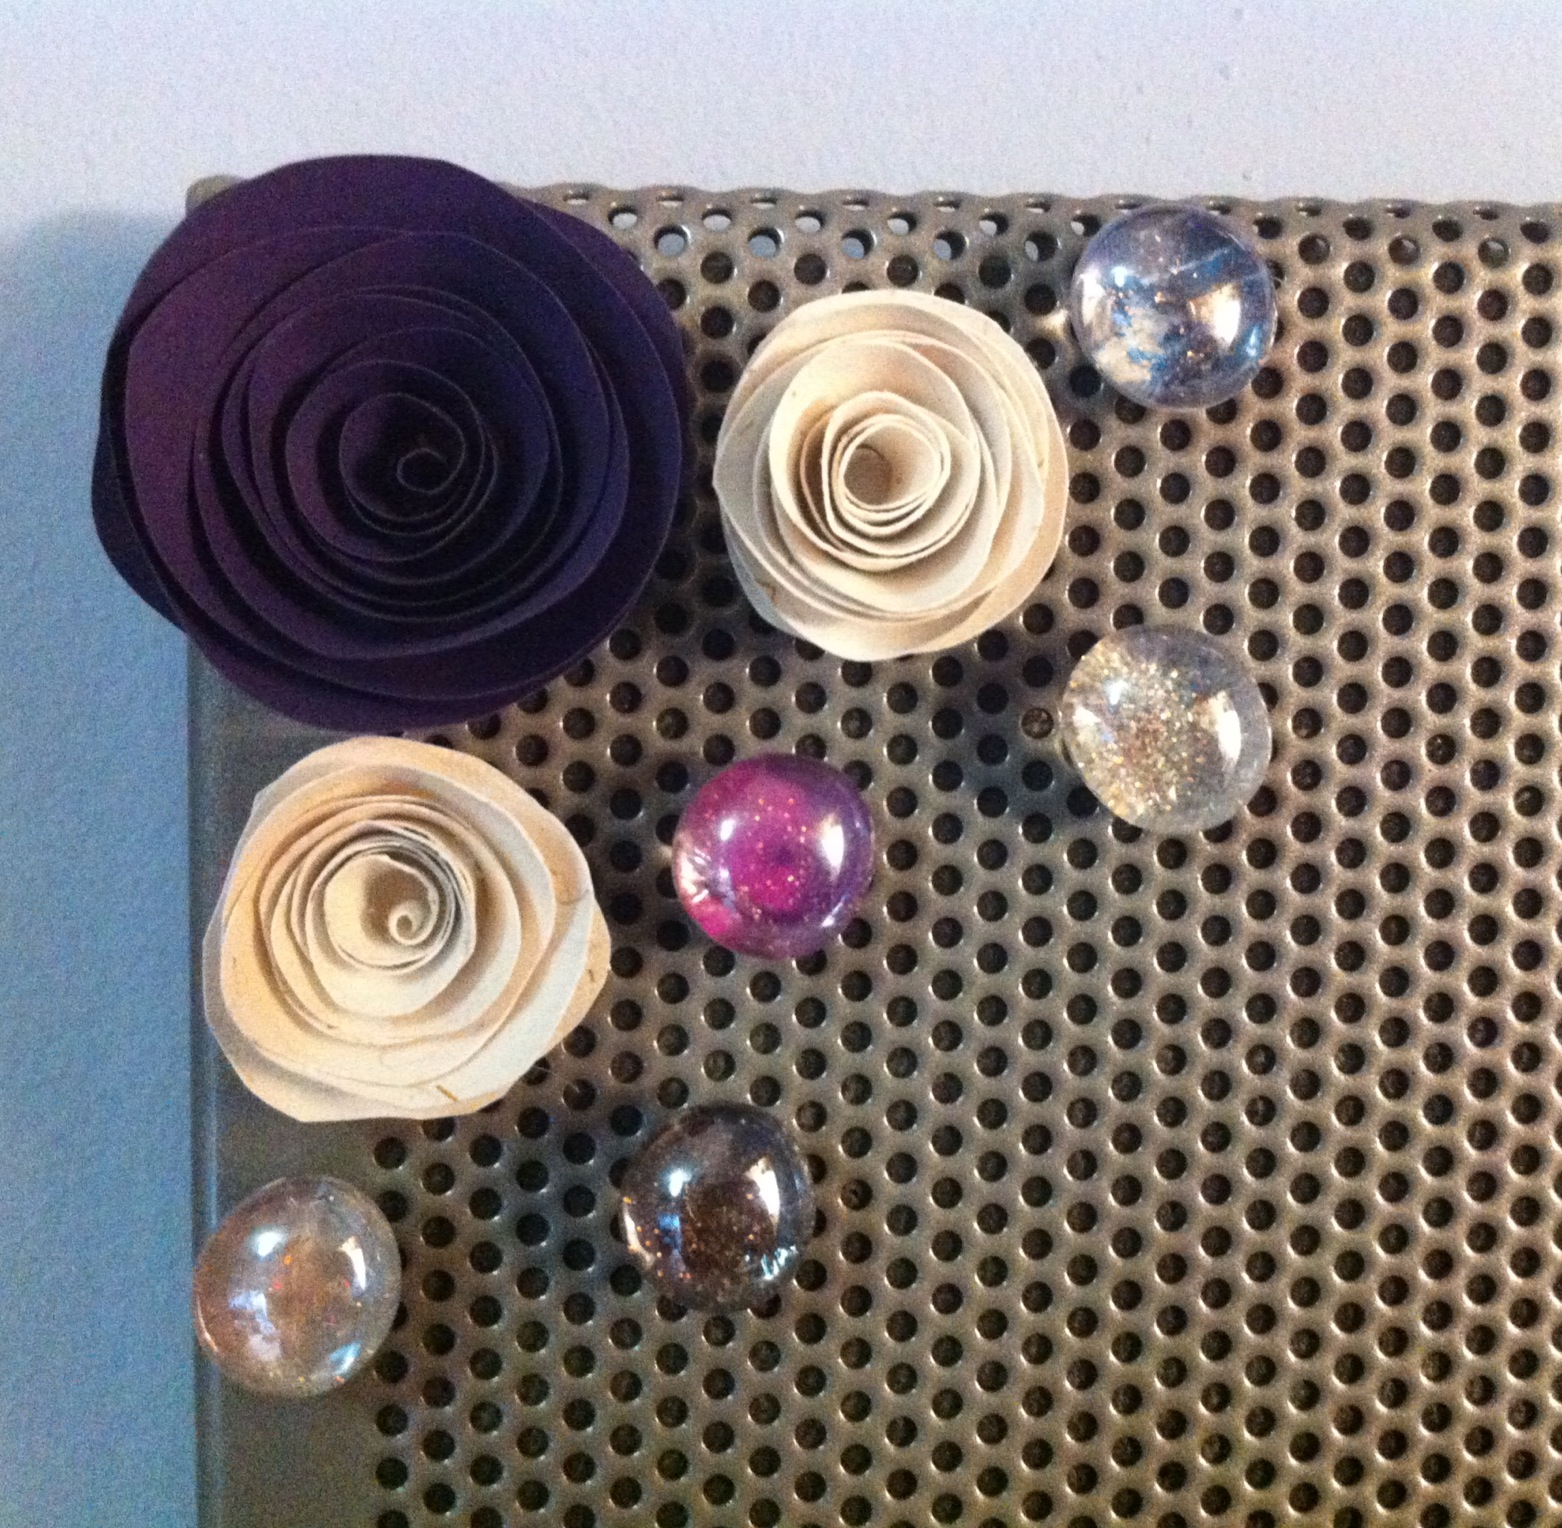
My Magnet Board In My Craftroom With Magnets I've Made

I took a couple of the magnets that I've made from my Spiral Paper Flower Tutorial and my Glitter Domed Glass Magnet Tutorial  and updated my magnet board in my craft room.  It was getting a little cluttered so I cleared it out except for these in the corner, leaving plenty of room for new crafty items of inspiration.

Monday, February 11, 2013

Glitter Colored Domed Glass Magnets Tutorial


I have a couple of magnetic boards in my house (one in my craft room and two over the desk in my kitchen) and I am always looking for different magnets to use on them.  I had a couple of bags of flat bottom glass marbles and a ton of old magazines laying around so I decided to make my own magnets.  Here's what I did:


Glitter Colored Domed Glass Magnets Tutorial:
Supplies:

  • Flat bottom glass marbles
  • Old magazines, old kids books, scrapbook paper or any other printed paper
  • Glue gun and Glitter glue sticks (if you dont have a glue gun, you could do this with Mod Podge and loose glitter, but I find it easier to use the glue sticks with the glitter already built in- one less step)
  • Magnets smaller than the size of the flat bottom marbles you're using
  • Scissors

Directions:
  1. Heat up your glue gun- put a glitter glue stick inside.
  2. Trace the outside of the flat bottom glass marble on the paper you want to make the marble out of. I've found that they are all a little different in shape so I trace each individually. If yours are more uniform then trace another piece of paper/thin cardboard to make a template that you can use instead.
  3. Cut out the backing just inside the line.
  4. Optional: If you would like to add any embellishments (like a cut out letter on top of the background) glue them (regular craft glue) to the top of the cut out paper now.
  5. Put a dab of the glitter glue on the flat side of the glass marble. Attach the paper to the back of the marble (making sure to press from the inside out).
  6. Once the glue has dried, add another dab of glue to the back of the paper and attach your magnet.
  7. Enjoy your new magnet!

Wednesday, April 25, 2012

Another Awesome Rainbow Out My Window At Work

This was a full one from end to end, so big I couldn't even fit it all into one photo.

Monday, April 2, 2012

Glass Money Jar- An Auction Find

My sister in law got married last summer and my hubby decided that it would be a good idea to use our old money jug (which held more change and was more of a real jug shape) for a coin toss game at the stag even though I asked him not to. Of course, as predicted, it ended up getting not only broken but shattered into 100s of pieces. It took forever (8 months) but he finally found me a replacement.

Wednesday, February 22, 2012

Kitty In A Box Helping Me Craft

One of my two grey cats, Bailey loves cardboard boxes.  As i was taking the photos she was very interested in sniffing the camera, so I was actually able to get some of her looking at the camera (which with the other cat is hard to do).

Sunday, September 11, 2011

Beach at the Jersey Shore

One of the beaches on Long Beach Island.

Dragonfly on my foot

Well my nail polish looks horrible but still thought it was pretty cool!!

Saturday, March 5, 2011

Etsy Treasuries

Treasury - Shimmer and Shine in Teal
Treasury - Shimmer and Shine in Blue
On Etsy ( a website where you can sell and buy handmade or vintage items) I just recently came accross the "Treasury" section of the site. The idea is that you can go through and search through other peoples items for sale, and group 16 of them together by a common theme. I decided to try it out and I created two treasuries- both themes being specific colored (teal and deep blue) glass bead jewelry (and the blue one is half flowers). Etsy goes through the listing of handmade treasuries and everyday pick one to showcase on the main page. I had a fun time doing it because it gets you to look around the site and see all of the cool items other artisans have created.

Thursday, January 20, 2011

Reupholsterd Dining Room Chairs

We purchased our dining room set two years ago second hand after going and looking at the prices of new sets (some places it was over $1000 just for a hutch).  I like the set, but have been wanting to reupholster the chairs ever since we got it. The old fabric (left side) was really not my style, plus a couple of them had small stains.  We ended up reupholstering with a blue shiny fabric- and since I love blue, I love the new chairs.  Both of our parents had reupholsterd items before, and with their knowledge and tutorials we found online, everyone says to staple down the middle of the bottom and top first.  We tried it like this, but found it really hard to line up the new pattern accross the bottom, so in the end we staple all of bottom down and work from there.  The tensions seemed to work out, and it got the bottom lined up perfectly.