Showing posts with label Patterns/Tutorials. Show all posts

Monday, February 9, 2015

Crayon Heart Valentines Tutorial


My sister, who teaches first grade, came over last week to have me help her make Valentines for her students. She had picked up some small Valentines Day themed pads of paper and she wanted to make multi colored crayons to go with them. I happened (because I'm a crafty hoarder lol) to have a silicon heart chocolate mold sitting around the she used to make her crayons. They're easy to make and they are the perfect way to reincarnate old broken crayons into something awesome!


Crayon Valentines Hearts

Supplies Needed:
* Old Crayons
* Silicon Heart Mold
* Cookie Tray (for stability when taking mold in/out of the oven)
* Oven

Directions:
1. Pre-heat the oven to 230 degrees.
2. Cut up old crayon into small bits.  If you are making these with kids, they can break them into small pieces with their hands. 

3. Put an assortment of colors into each heart mold. 


4. Place the silicon mold onto a cookie tray for stability putting the mold in and taking it out of the oven. Put the mold into the oven for 15 mins.
5. Take the mold out of the oven and let the mold sit for 10 mins. 
6.  Stick the mold into the fridge for a couple of minutes and the crayons will pop right out!
7. Enjoy!!


Monday, February 11, 2013

Glitter Colored Domed Glass Magnets Tutorial


I have a couple of magnetic boards in my house (one in my craft room and two over the desk in my kitchen) and I am always looking for different magnets to use on them.  I had a couple of bags of flat bottom glass marbles and a ton of old magazines laying around so I decided to make my own magnets.  Here's what I did:


Glitter Colored Domed Glass Magnets Tutorial:
Supplies:

  • Flat bottom glass marbles
  • Old magazines, old kids books, scrapbook paper or any other printed paper
  • Glue gun and Glitter glue sticks (if you dont have a glue gun, you could do this with Mod Podge and loose glitter, but I find it easier to use the glue sticks with the glitter already built in- one less step)
  • Magnets smaller than the size of the flat bottom marbles you're using
  • Scissors

Directions:
  1. Heat up your glue gun- put a glitter glue stick inside.
  2. Trace the outside of the flat bottom glass marble on the paper you want to make the marble out of. I've found that they are all a little different in shape so I trace each individually. If yours are more uniform then trace another piece of paper/thin cardboard to make a template that you can use instead.
  3. Cut out the backing just inside the line.
  4. Optional: If you would like to add any embellishments (like a cut out letter on top of the background) glue them (regular craft glue) to the top of the cut out paper now.
  5. Put a dab of the glitter glue on the flat side of the glass marble. Attach the paper to the back of the marble (making sure to press from the inside out).
  6. Once the glue has dried, add another dab of glue to the back of the paper and attach your magnet.
  7. Enjoy your new magnet!

Sunday, February 10, 2013

Fleece Stuffed Rainbow Star Pillow Sewing Pattern Tutuorial


My mother in law gave me this star wall hanging made out of upcycled magazines for Xmas.  Last week I was bored and looking around my craftroom for inspiration of something I could sew and I focused in on the star.  Recently in a sale I stocked up on a bunch of fleece fabric remnants since they were so cheap, so I decided to make a fleece 3D star.  I think if I made another one I'd replace the yellow color with somethign else but overall I like how it came out.  The pillow came out approximately 14.5 inches accross when finished so its the perfect sized pillow for a nursery or as a fun accent anywhere. If you'd like to make your own check out the pattern below...

**If you sell or post any items made from this pattern, please include a link back to my site.  (EX- "This item was made from a pattern on Stargazun Designs" ) Thanks!!**

Fleece Stuffed Rainbow Star Pillow Pattern:
Supplies:
  • Scraps of 10 colors of fleece
  • Pattern Tracing material like Pellon 830 (optional)
  • Ruler
  • Rotary cutter and mat or Scissors
  • Thread (I used a medium tone grey- it seemed to blend the best with all of the colors)
  • Hand Sewing Needle
  • Sewing Machine

Directions:
  1. I created a pattern on my pattern tracing material. Measure and cut a piece 2.5in by 10in. On one of the longer sides, mark up 3.5in. Using your ruler, make two cuts by connecting the mark to each of the opposite corners. You should now have a off center triangle like below. (*NOTE* If you don't create a pattern, you can cut each piece of the star like this to get the same result.)
  2. Cut out two triangles of each of the fabrics. Make sure you cut them opposite- one with the pattern right side up and one with it wrong side up. After cutting, when you line up like sides, the triangles should be right sides together. The easiest way to do this is to fold your fabric in half and cut two pieces at once (which I know is sometimes hard to do with fleece).
  3. Lay your pieces for one side in whatever order you choose. (Match long sides of the triangle to create a star point. Keep the smallest edges towards the middle of the triangle and match those in between points.) Repeate the same pattern with the pieces of the other side WRONG side up.
  4. With your fabrics that are right side up, sew along the long edges creating 5 sections of the star (sew them in the order they are in but make sure to keep the seams on the WRONG side of the fabric).  Sew the 5 sections together along smallest sides. Repeate with the pieces that were layed out wrong side up (again, keep them in the order they are in but make sure to keep seems on the WRONG side).
  5. In the center, my sewing wasn't perfect and my edges didn't match up perfectly. I took some thread and needle and hand sewed the pieces together where needed. If you dont want to do this you can put a button in the middle of both sides once the piece is finished to cover up any imperfections.
  6. Put the two star shaped pieces RIGHT SIDES together. Match colors and pin.
  7. Sew around the edges leaving a 4in seam opening on one of the edges of the star.
  8. Clip down points so there isn't a lot of excess fabric. Turn the star right side out making sure to push out points.
  9. Stuff.
  10. Hand sew opening closed.
  11. Enjoy your new pillow!

Sunday, June 10, 2012

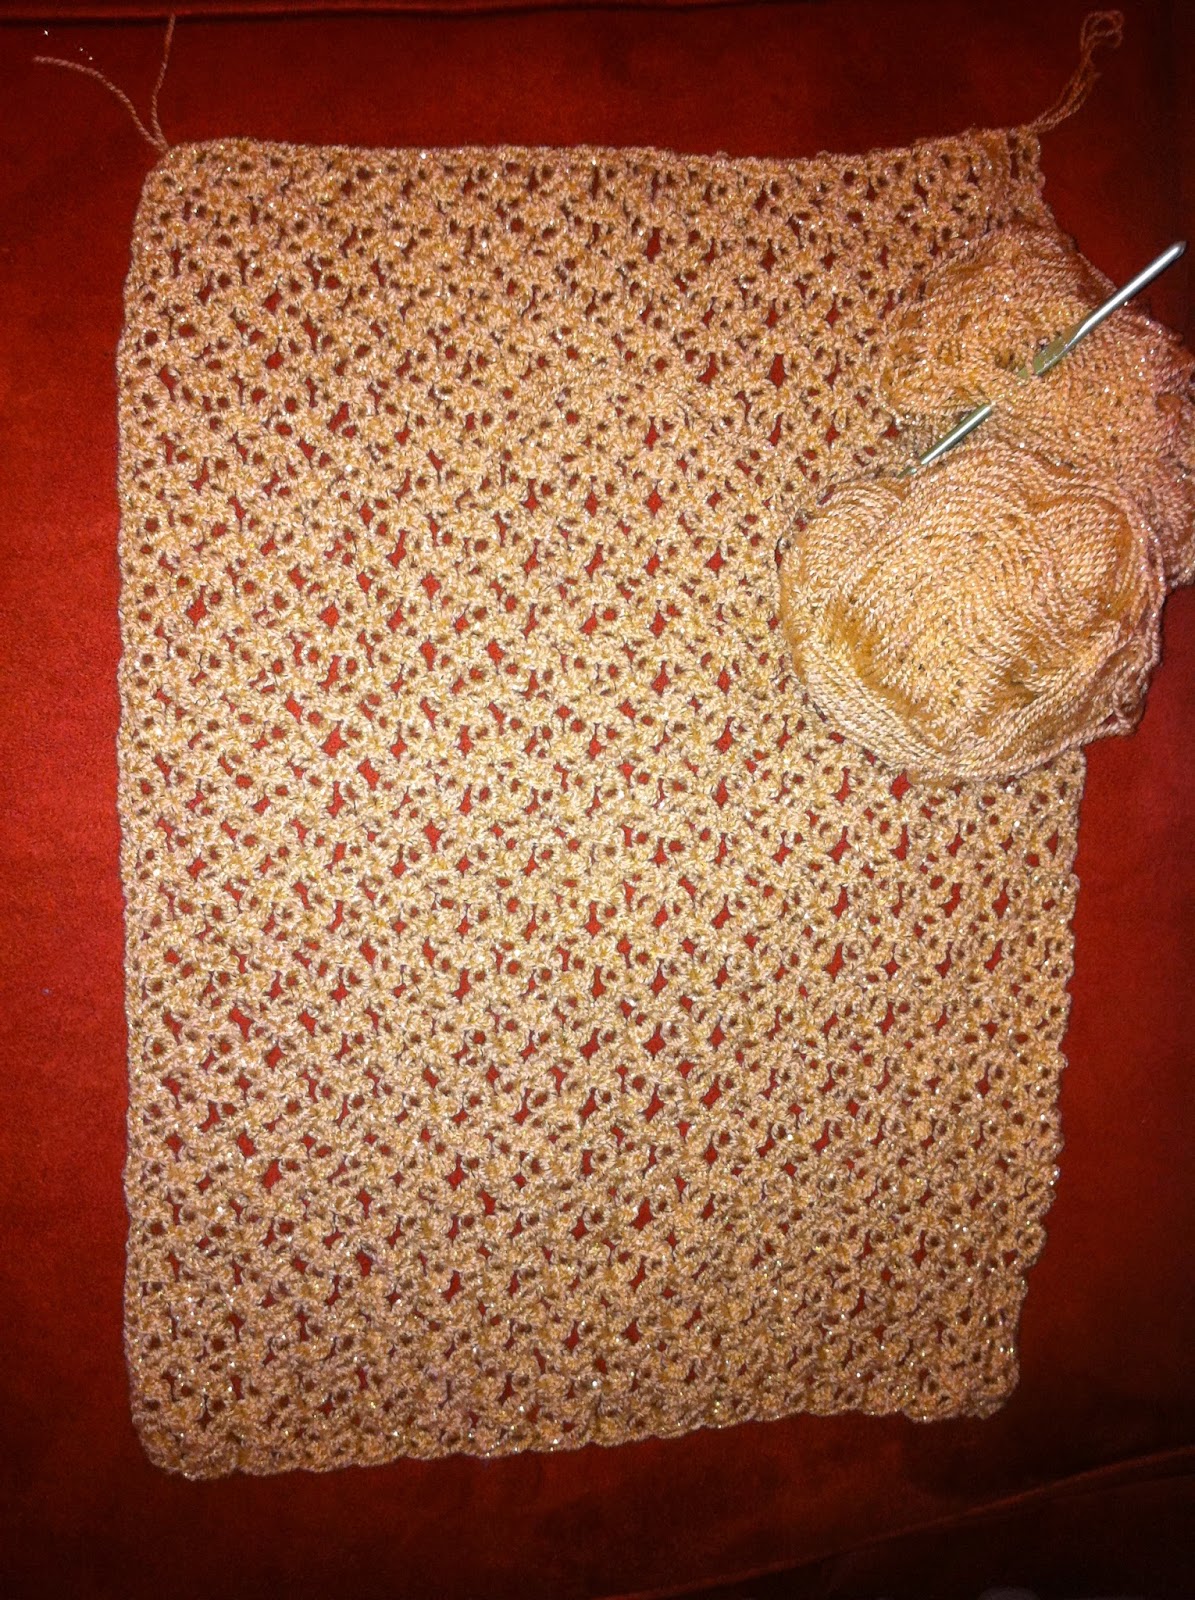
Solomons Knot Gold Crochet Shrug - Second Trial

 As I mentioned in my original Solomons Knot Shrug post, the shrug I made from the pattern on page two of the linked post above didn't end up fitting quite right around the arms so I tried it again and it ended up fitting much better. :)  Below I explained what I did for the second shrug.
*Also to note: for this shrug I used two strands held together of Vanna's Glamour Yarn in Topaz with an I hook.
 

1. Crochet a rectangle of Solomons Knot crochet the width of your shoulders (measuring behind your neck all the way to the end of each shoulder) and the height of the distance around your arm plus a little wiggle room.   The basics of the Solomons knot can be found here.


2. Single crochet along one long side of the rectangle (the shoulder distance). Continue the single crochet around the corner to the short side.  At the end of that short side, I joined the last stitch to the first stitch of the short side with a single crochet. 
3. After joining the first side (which creates the first arm hole) I continued the single crochet on the next long length.  Again, with the second short side, I single crochet the whole length and then joined the end stitch back to the first stitch of the side with a single crochet.  At this point there should be three 'sections' - two arm hole circles and one circle for your body.
4.  To finish the ends off, I double crochet three rows around the body section - making sure not to include the arm holes.  I then did the same (three rows of DC) around each of the arm holes. 
5. Done! 

Saturday, October 1, 2011

Beginner Crochet Two-Tone Cuff Bracelet


 Beginner Crochet Two-Tone Cuff Bracelet:
Yarn Used
: Vannah's Glamour in Jewel and Platinum (leftover scraps of one skein)
Hook Used: Size 2 or C

**If you sell or post any items made from this pattern, please include a link back to my site.  (EX- "This item was made from a pattern on Stargazun Designs" ) Thanks!!**
  • Using COLOR 1: Chain until the chain fits around your wrist (or the wrist of the person you're making the bracelet for) end to end. 
  • Chain 9 more.  (The bracelet overlaps 8 chains, the first two count as the first half double crochet, the other chains make up the rest of the 8).
  • Row 1: Using COLOR 1: Half Double Crochet (HDC) in 3rd chain from the hook and in all accross.
  • Row 2: Using COLOR 1:  Ch 2 to start the row. Half Double Crochet (HDC) in all previous rows HDCs UNTIL you have the 8 last HDCs left.  Measure the diameter of the button you plan on using to the stitches you have to determine how many HDCs you'll have to skip and chain instead. (Ex: The diameter of the button I used was the same size as three stitches, so I HDC in the next three, chained three and skipped three HDCs from the previous row, then HDC in the last two HDCs from the previous row).
  • Row 3: USING COLOR 2: Fasten off COLOR 1.  Attach COLOR 2 in last HDC from previous row.  HDC in each HDC from previous row, including HDC in the chain from the previous row the number of chains that were created. (Ex: The diameter of the button I used was the same size as three stitches, so I HDC three in the chain.)
  • Row 4: Using COLOR 2: Half Double Crochet (HDC) in all accross. 
  • Weave in ends.
  • Attach the button:  I used clear quilting thread to sew the button on, but  any matching thread will do.

Monday, September 19, 2011

Beginner Crochet 'Mesh' Cuff Bracelet Pattern

 Beginner Crochet 'Mesh' Cuff Bracelet:
Yarn Used
: Vannah's Glamour in Jewel (leftover scraps of one skein)
Hook Used: Size 2 or C

**If you sell or post any items made from this pattern, please include a link back to my site.  (EX- "This item was made from a pattern on Stargazun Designs" ) Thanks!!**
  • Chain until the chain fits around your wrist (or the wrist of the person you're making the bracelet for) end to end. 
  • Chain 9 more.  (The bracelet overlaps 8 chains, the first two count as the first half double crochet, the other chains make up the rest of the 8).
  • Row 1: Half Double Crochet (HDC) in 3th chain from the hook and in the next 6.
  •  *Chain 1, skip one chain from previous row, HDC in next.  Repeate until there are 8 HDCs from the previous row left, then HDC in each of the previous HDCs. This makes the last 8 on each end solid while the center is 'mesh'.*
  • Row 2: Chain 2 to start the next row, HDC in 2nd HDC from the previous row and next 6.  Finish the row same as last row (from * to *).
  • Row 3: Same as row 2 EXCEPT stop when you have the 8 last HDCs left.  Measure the diameter of the button you plan on using to the stitches you have to determine how many HDCs you'll have to skip and chain instead. (Ex: The diameter of the button I used was the same size as three stitches, so I HDC in the next three, chained three and skipped three HDCs from the previous row, then HDC in the last two HDCs from the previous row).
  • Row 4: Chain 2 to start the next row, HDC in the next 7.  HDC in chain for the number of chains you made.  (Ex: For my bracelet I chained two for the first HDC, HDC in the next, HDC three in the chain then HDC three.) Finish the row as the previous rows (from * to *).
  • Row 5: Chain 2 to start the next row, HDC in 2nd HDC from the previous row and next 6.  Finish the row as the previous rows (from * to *).
  • Weave in ends.
  • Attach the button:  I used clear quilting thread to sew the button on, but  any matching thread will do.

Sunday, August 14, 2011

Beginner Mesh Throw Blanket Pattern


Beginner 'Mesh' Throw Blanket:
Yarn Used: Vannah's Choice Acrylic in Purple Print (4 large skeins - 6oz each)
Hook Used: Size J10/6.00mm

**If you sell or post any items made from this pattern, please include a link back to my site.  (EX- "This item was made from a pattern on Stargazun Designs" ) Thanks!!**
  • Chain until the chain is the lenth of the desired width of the blanket. Keep track of how many you chain- this needs to be an even number.  
  • Chain 4 more (for first DC and first space). 
  • DC in 6th chain from the hook.
  • * Chain 1, skip one chain from previous row, DC in next.  Repeate until row is complete (make sure you DC into the third chain of the chain 4 of the previous row).
  • Chain 4 to start the next row, DC in 2nd DC from the previous row. *
Continue to repeate the last two bullets until the blanket has reached its desired length.


For mine, I made the blanket to be throw sized- something I'd use on the couch while watching tv.  For the foundation chain, I chained 116 + 4 (for the DC on the end of the row and the first space).  This made the blanket 32 inches wide.  I used a little under 4 skeins of the yarn, which made the blanket 70 inches long.  Below is the blanket (folded so the width of the blanket is the longer side you see) on a full size bed. 

Wednesday, April 27, 2011

Easy Square 'Mesh' Cotton Dishcloth/Facecloth Tutorial - Beginner Pattern

Easy Square 'Mesh' Cotton Dishcloth/Facecloth:
Yarn Used: Lily Original Sugarn 'n Cream (in Lotus Blossom, Lava Lamp and Mod Ombre)
Hook Used: Size H8/5.00mm

**If you sell or post any items made from this pattern, please include a link back to my site.  (EX- "This item was made from a pattern on Stargazun Designs" ) Thanks!!**
  • Chain 27
  • Row 1:
    • DC in 4th chain from hook (ch3 counts as first DC)
    • DC in all others accross (including top chain of ch3) - 25 st total
  • Rows 2 and 3:
    • ch3 (counts as first DC from here on)
    • DC in all others accross (including top chain of ch3) - 25 st total
  • Rows 4-10:
    • Ch 3
    • DC in next 5
    • *Ch 1, skip 1 DC of previous row, DC in next* Repeat 7 times
    • DC in last 5 (including top chain of ch3) - 25 st total
  • Rows 11-13:
    • Ch 3
    • DC in all others accross (including top chain of ch3) - 25 st total
  • Weave in Ends

Sunday, March 20, 2011

Easy Round Thick Crochet Rug Pattern- Beginner Tutorial

In my stash of yarn, I had two full skeins of Wool-Ease Thick and Quick (part wool & part acrylic) yarn and decided I should finally do something with it.  I ended up making a round crochet rug with it, that I think I'll use in my bathroom in front of the sink (tile is so cold!!).  It was really easy to make and was very quick.  I'm still not decided if I am going to leave it the size it is or get another skein and make it a little bit bigger.   


Easy Round Thick Crochet Rug:
Yarn Used: Lion Brand Wool Ease Thick and Quick (I used Color #144- Denim)
Hook Used: Size US N (15)/ 10mm

**If you sell or post any items made from this pattern, please include a link back to my site.  (EX- "This item was made from a pattern on Stargazun Designs" ) Thanks!!**
  •  Ch 5
    • Join to 1st stitch with sl st to form a circle.
  • Row 1:
    • Ch3 (counts as 1st DC)
    • DC 11 more into circle
    • Join with sl st to the top of the ch3
      • Total: 12 stitches
  • Row 2:
    • Ch3 (counts as 1st DC)
    • DC in 1st DC of last round
    • 2 DCs in each of the remaining DCs of the last round (11)
    • Join with sl st to the top of the ch3
      • Total: 24 stitches
  • Row 3:
    • Ch 3 (counts as 1st DC)
    • 2 DCs in next DC of last round
    • *DC in next, 2 DCs in next* - Repeat 11 times
      • Total: 36 stitches
  • Row 4:
    • Ch3 (counts as 1st DC)
    • DC in next DC of last round
    • 2 DC in next DC of last round
    • *DC in the next two , 2 DCs in next* - Repeat 11 times
      • Total: 48 stitches
  • Row 5:
    • Chain 3 (counts as 1st Double Crochet)
    • DC in next 2
    • 2 DC in next DC of last round
    • *DC in the next three , 2 DCs in next* - Repeat 11 times
      • Total: 60 stitches
  • Row 6 and on - Each row adds an additional 12 evenly spaced out stitches.  For each row, do one more DC after the Ch3 and add one DC to the section that is repeated (aka- Row6: Ch3, DC in next 3, DC2, *DC in next 4, 2DCs in next* 11 times-72 stitches)

Two skein made the rug 22 inches in diameter.  Obviously, keep going if you want a larger rug.

***Note:  This pattern will increase in the same spot on each row.  To avoid this, split up the DCs from the first repeated section. AKA- If you are doing  row 6, you will be doing *4DCs, DC2 in next* 12 times (the first time being the time where ch3 counts as the first DC).  To move the increase, DC1, DC2 in next, *3DCs, DC2 in next* 12 times and make up the two DCs that were missed at the end.  If you have any questions, please leave me a message, I'd be happy to help.***

I crochet this rug in rows, instead of continuous because I like the look of each row of circles lining up. I made it all one color because that's what I had lying around, but by crocheting it in the round, it makes it a lot easier (and more finished looking) to change between different colors.  To do this, finish a whole row, sl st to the top of the last chain, weave in ends and start the next row with a new color.


One skein

Two Skeins

Rug after second skein of yarn- just managed to finish the whole round... thats all thats left of the yarn!


In front of the sink in the bathroom


Friday, February 4, 2011

Spiral Paper Flowers Magnets Tutorial

My sister in law is getting married this summer, and I thought it would be cool if she had some of these paper flowers on the guestbook table, either in a cluster or in a bowl or on a plate.  I made these with random scraps of paper I had lying around- I dont love the colors together but they worked for practice.  There are a lot of sites out there with great tutorials on how to make them, but here's the quick and dirty version:

**If you sell or post any items made from this pattern, please include a link back to my site.  (EX- "This item was made from a pattern on Stargazun Designs" ) Thanks!!**

1. Cut a square of paper. The size doesn't matter- a bigger square will make a bigger (wider) flower.  I trim the edges so they are rounded.
2. Cut a swirl pattern into the square, leaving about a 1/2 - 3/4 inch in the middle.  The width of the swirl is the height of the flower.  If you like, cut a wave design into the outer edge of the swirl to give the flower a different look. 
3.  Starting at the end (the edge of the 'square'), twist the swirl into a flower.  I glue the swirl to itself (one rotation around) at the beginning to keep the end together and at the end to the circle that was left in the middle.
These flowers all started as either 3x3 or 4x4 squares.  After making them and gluing them down, I attached a magnet to the back- just for something to do with them.

After making them, I think I preferred the paper that was dyed all the way through, so there wasn't a white line on the edge (the orange flower has the white line), though most of the interesting designs of scrapbook paper arent on paper that is dyed all the way through.